How to Choose Ventilation for a Grow Tent? Complete Guide
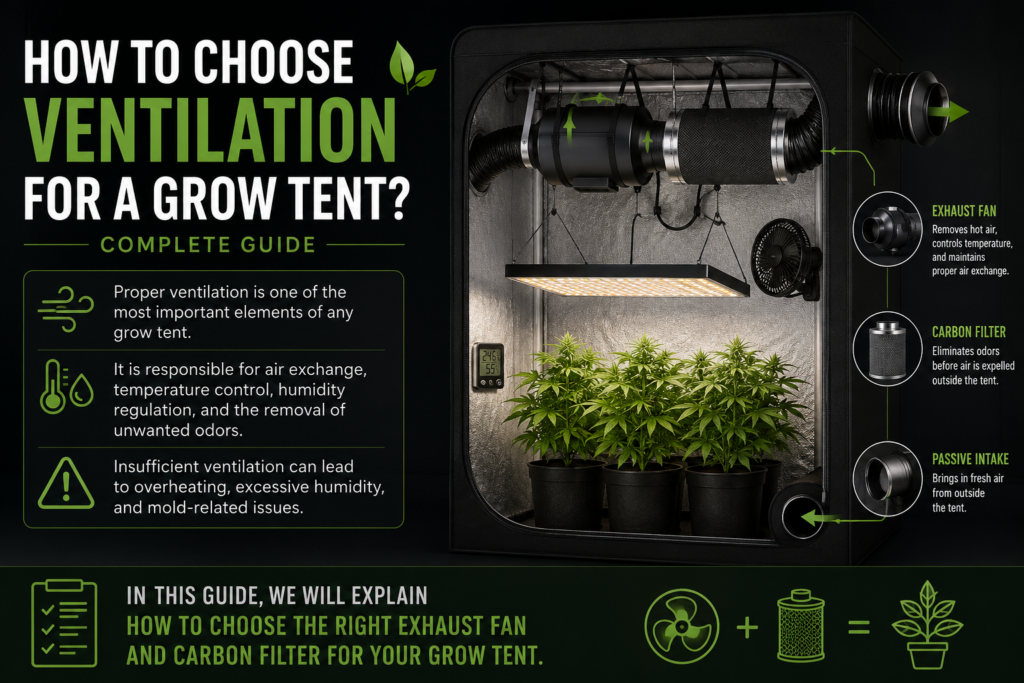
Proper ventilation is one of the most important elements of any grow tent. It is responsible for air exchange, temperature control, humidity regulation, and the removal of unwanted odors. Insufficient ventilation can lead to overheating, excessive humidity, and mold-related issues.
In this guide, we will explain how to choose the right exhaust fan and carbon filter for your grow tent.
Why Is Ventilation in a Grow Tent So Important?
Lorem ipsum dolor sit amet, consectetur adipiscing elit. Ut elit tellus, luctus nec ullamcorper mattis, pulvinar dapibus leo.
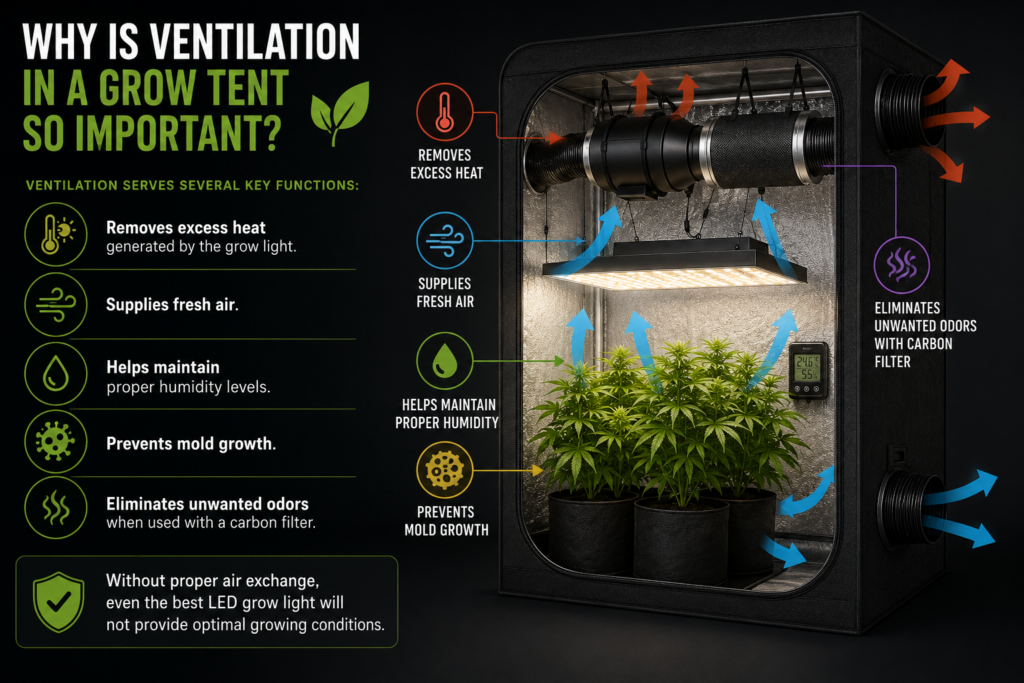
Ventilation serves several key functions:
Removes excess heat generated by the grow light.
Supplies fresh air.
Helps maintain proper humidity levels.
Prevents mold growth.
Eliminates unwanted odors when used with a carbon filter.
Without proper air exchange, even the best LED grow light will not provide optimal growing conditions.
How Does Grow Tent Ventilation Work?
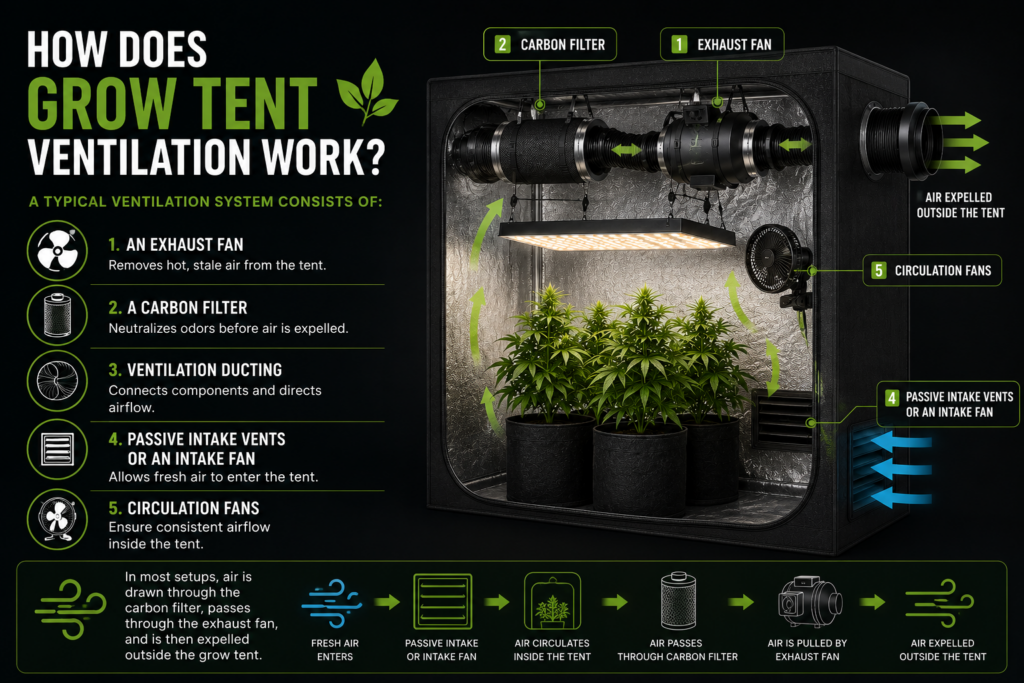
A typical ventilation system consists of:
An exhaust fan.
A carbon filter.
Ventilation ducting.
Passive intake vents or an intake fan.
Circulation fans inside the tent.
In most setups, air is drawn through the carbon filter, passes through the exhaust fan, and is then expelled outside the grow tent.
How to Calculate the Required Fan Capacity
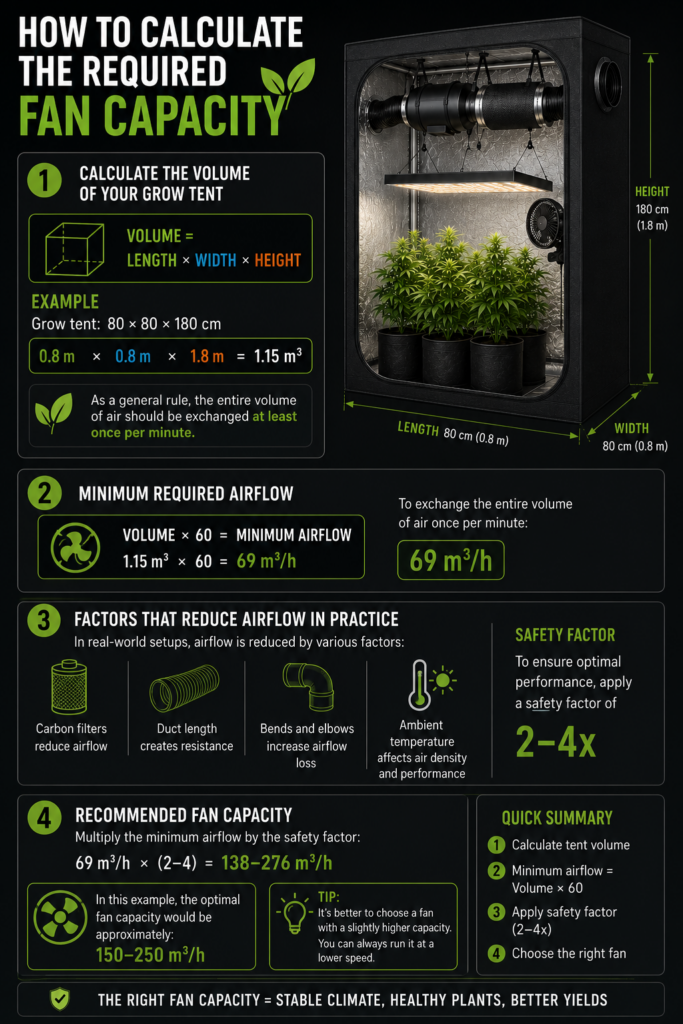
First, calculate the volume of your grow tent:
Volume = Length × Width × Height
Example
Grow tent: 80 × 80 × 180 cm
0.8 × 0.8 × 1.8 = 1.15 m³
As a general rule, the entire volume of air should be exchanged at least once per minute.
Minimum Required Airflow
1.15 × 60 = 69 m³/h
However, in practice, you should also account for:
Carbon filters.
Duct length.
Bends and elbows.
Ambient temperature.
For this reason, it is recommended to apply a safety factor of 2–4x.
In this example, the optimal fan capacity would be approximately 150–250 m³/h.
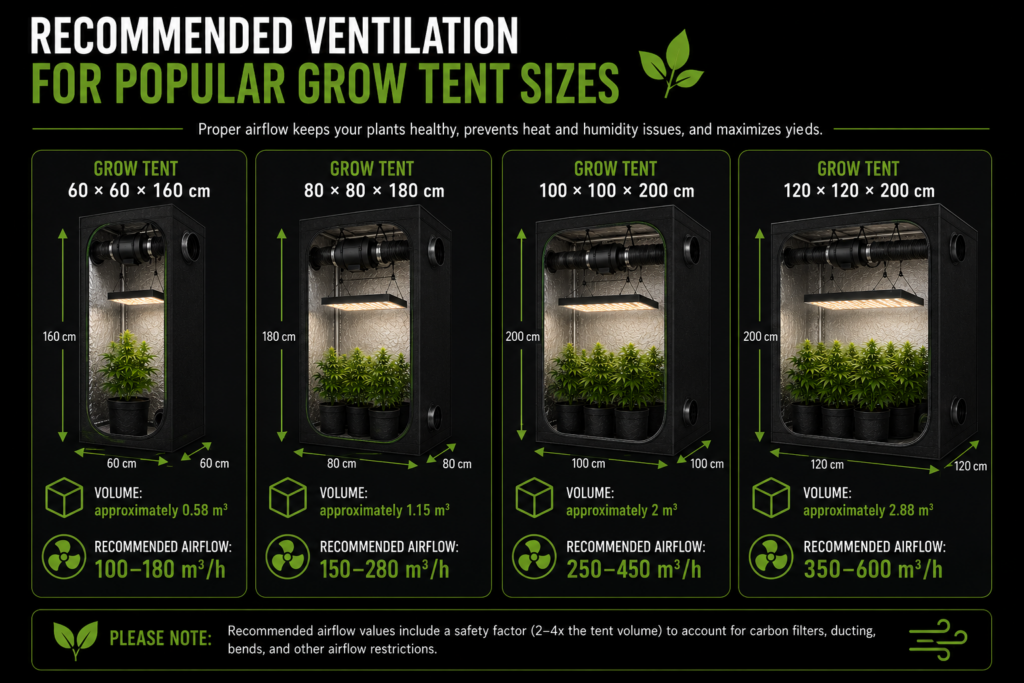
Recommended Ventilation for Popular Grow Tent Sizes
Grow Tent 60 × 60 × 160 cm
Volume: approximately 0.58 m³
Recommended airflow:
100–180 m³/h
Grow Tent 80 × 80 × 180 cm
Volume: approximately 1.15 m³
Recommended airflow:
150–280 m³/h
Grow Tent 100 × 100 × 200 cm
Volume: approximately 2 m³
Recommended airflow:
250–450 m³/h
Grow Tent 120 × 120 × 200 cm
Volume: approximately 2.88 m³
Recommended airflow:
350–600 m³/h
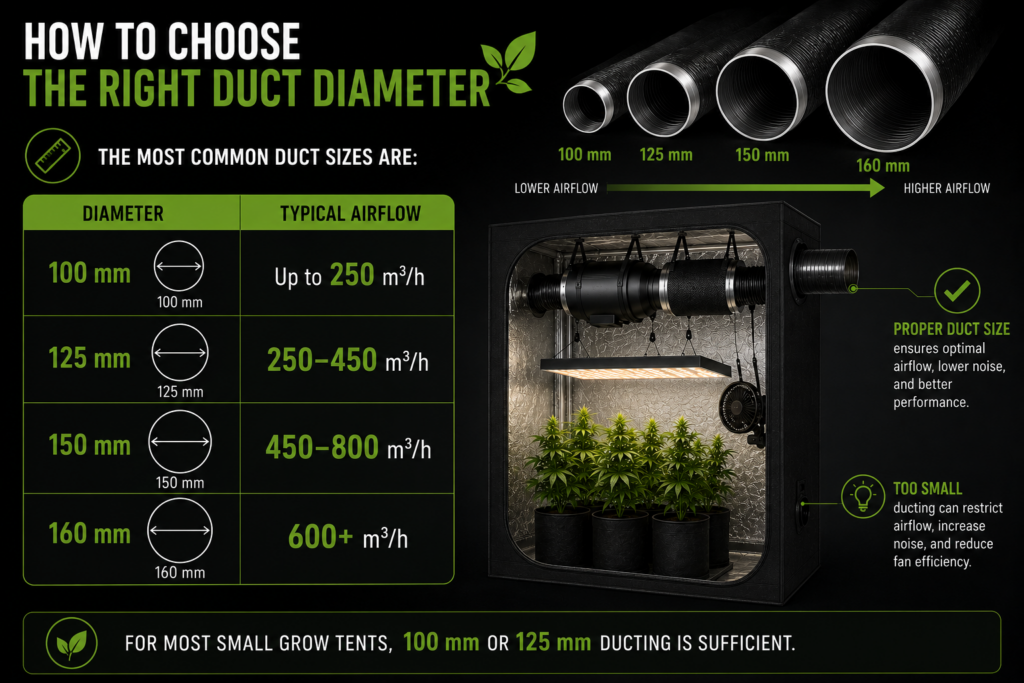
How to Choose the Right Duct Diameter
The most common duct sizes are:
Diameter
Typical Airflow
100 mm
Up to 250 m³/h
125 mm
250–450 m³/h
150 mm
450–800 m³/h
160 mm
600+ m³/h
For most small grow tents, 100 mm or 125 mm ducting is sufficient.
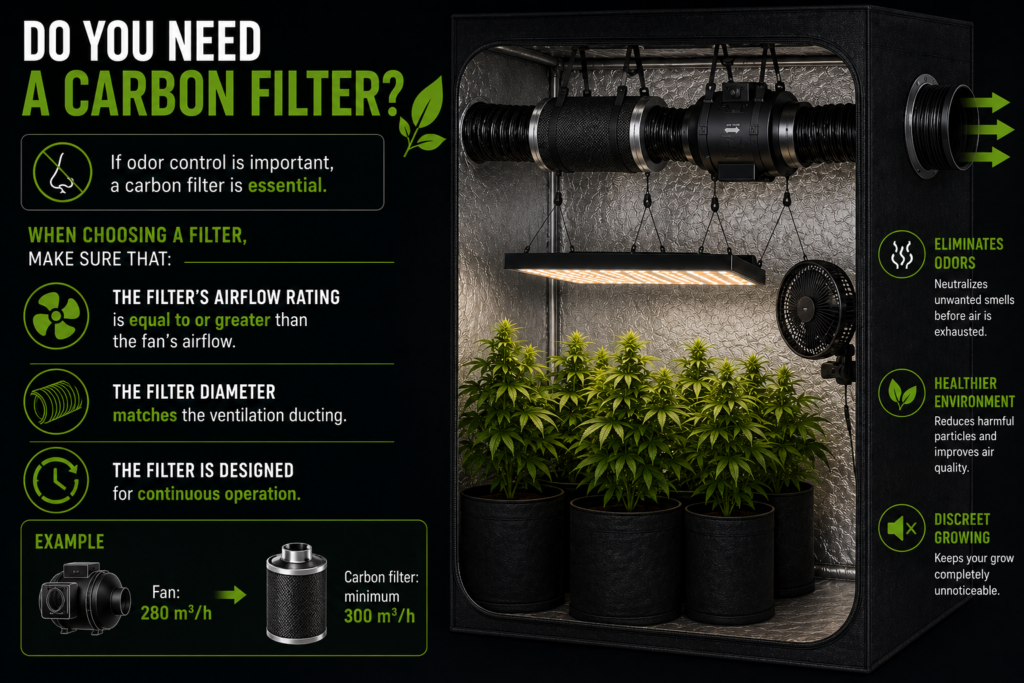
Do You Need a Carbon Filter?
If odor control is important, a carbon filter is essential.
When choosing a filter, make sure that:
The filter’s airflow rating is equal to or greater than the fan’s airflow.
The filter diameter matches the ventilation ducting.
The filter is designed for continuous operation.
Example
Fan: 280 m³/h → Carbon filter: minimum 300 m³/h
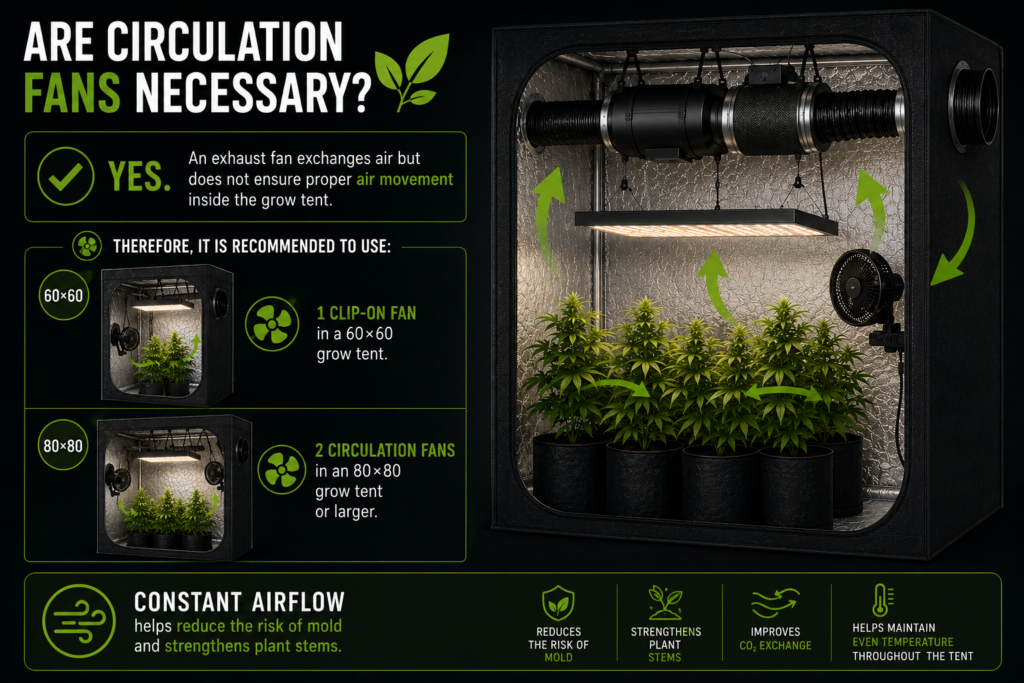
Are Circulation Fans Necessary?
Yes.
An exhaust fan exchanges air but does not ensure proper air movement inside the grow tent.
Therefore, it is recommended to use:
1 clip-on fan in a 60×60 grow tent.
2 circulation fans in an 80×80 grow tent or larger.
Constant airflow helps reduce the risk of mold and strengthens plant stems.
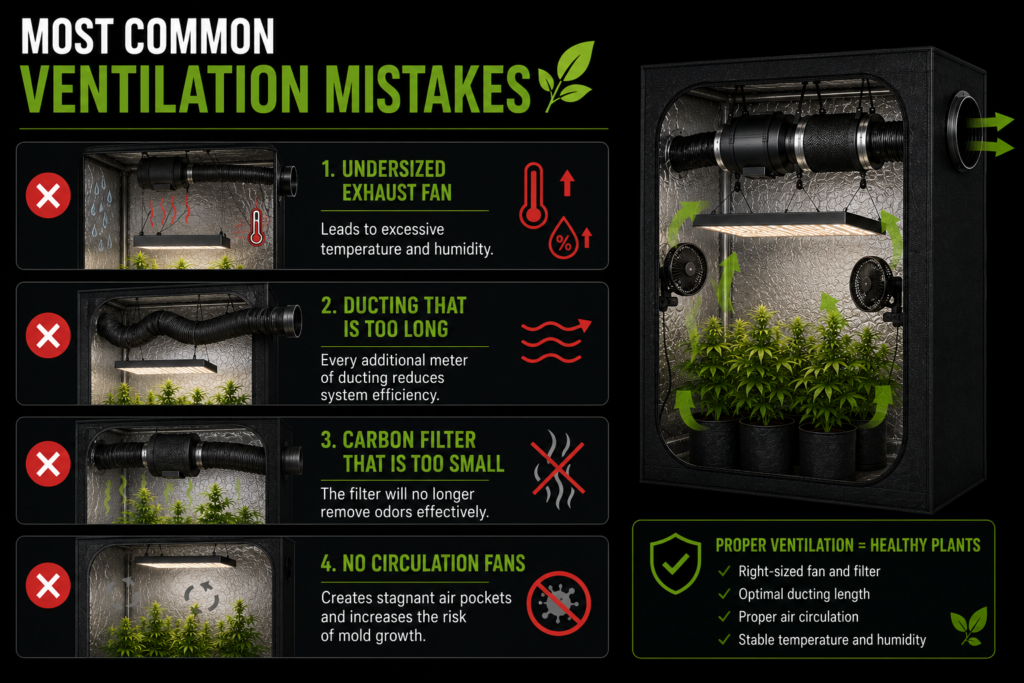
Most Common Ventilation Mistakes
Undersized Exhaust Fan
Leads to excessive temperature and humidity.
Ducting That Is Too Long
Every additional meter of ducting reduces system efficiency.
Carbon Filter That Is Too Small
The filter will no longer remove odors effectively.
No Circulation Fans
Creates stagnant air pockets and increases the risk of mold growth.
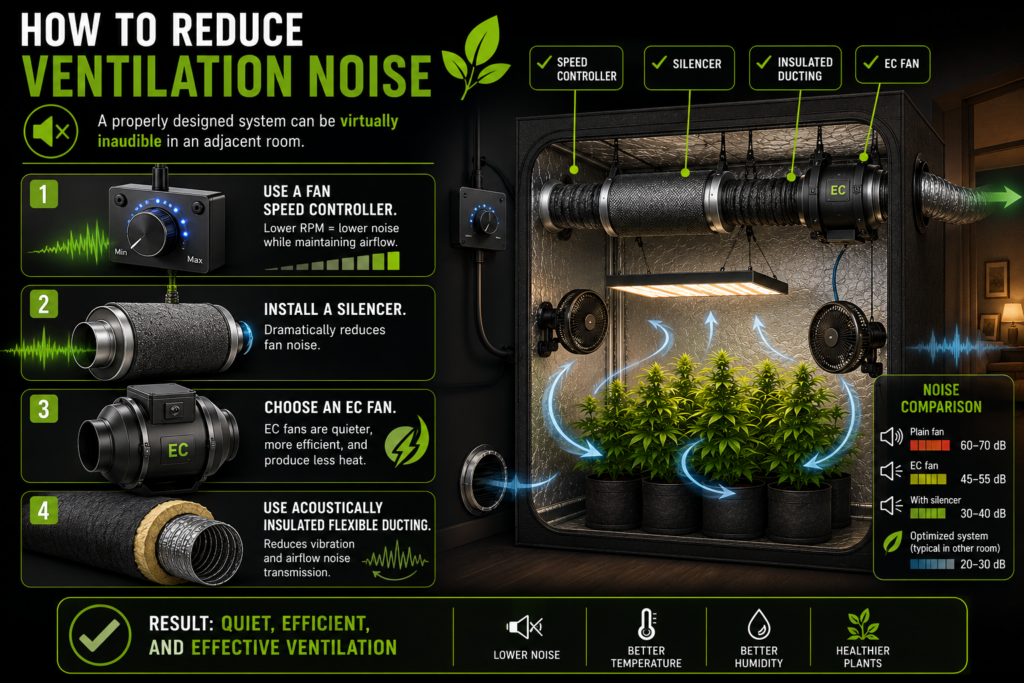
How to Reduce Ventilation Noise
If your fan is too loud:
Use a fan speed controller.
Install a silencer.
Choose an EC fan.
Use acoustically insulated flexible ducting.
A properly designed system can be virtually inaudible in an adjacent room.
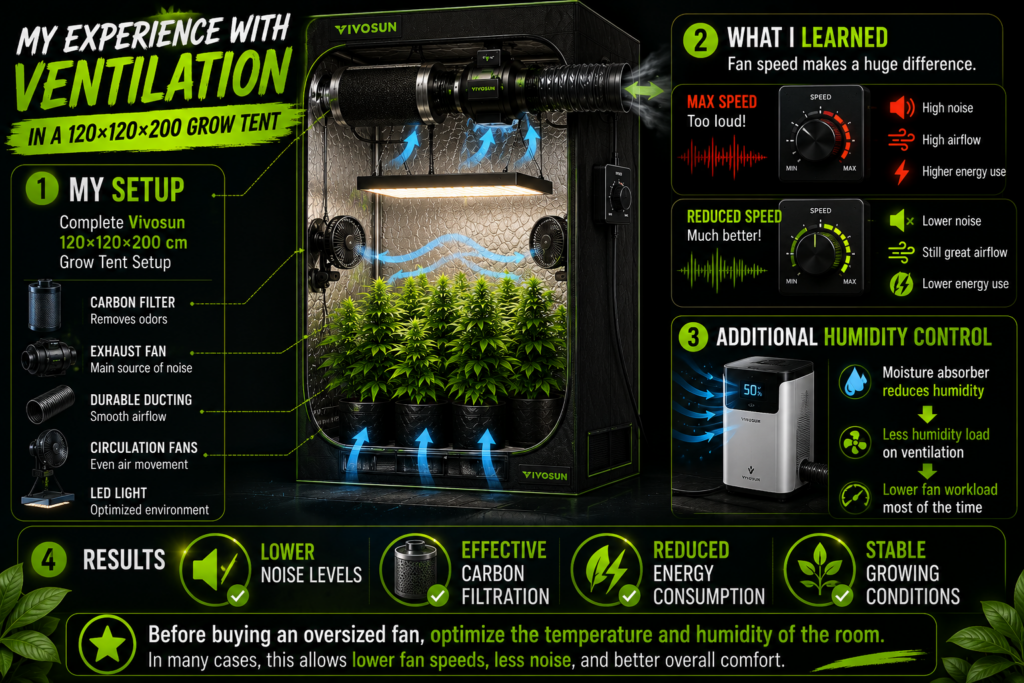
My Experience with Ventilation in a 120×120×200 Grow Tent
I currently use a complete Vivosun 120×120×200 cm grow tent setup, equipped with a carbon filter and an exhaust fan. In theory, this configuration provides excellent air exchange, but it is worth noting that high-performance fans can be quite noticeable, especially when operating at maximum speed.
In my setup, the exhaust fan is the main source of noise. Initially, I assumed it would need to run at high power almost constantly, but real-world experience proved otherwise.
I also use a moisture absorber, which means the ventilation system does not need to handle humidity reduction to the same extent as in many other setups. When the room temperature is stable and humidity remains within the desired range, the exhaust fan can operate at lower speeds for most of the time.
As a result:
Noise levels are significantly lower.
The carbon filter continues to work effectively.
Energy consumption is reduced.
Conditions inside the grow tent remain stable.
Based on my experience, before investing in an extremely powerful fan, it is worth focusing on the temperature and humidity of the room where the grow tent is located. In many cases, this allows you to significantly reduce the fan speed required for effective ventilation while improving overall comfort and reducing noise.
Summary
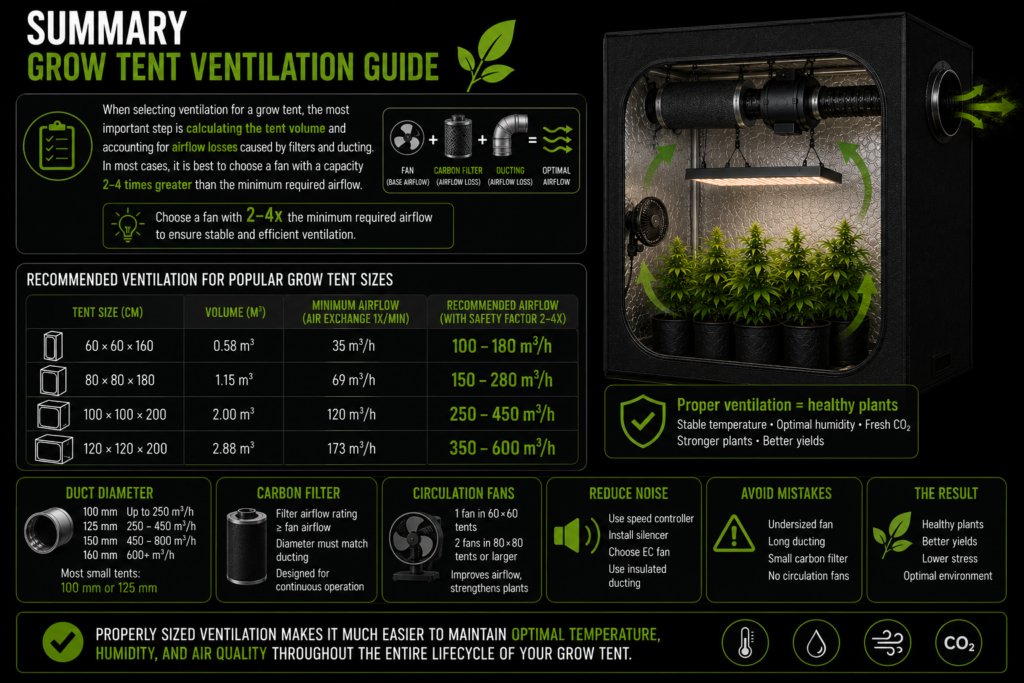
When selecting ventilation for a grow tent, the most important step is calculating the tent volume and accounting for airflow losses caused by filters and ducting. In most cases, it is best to choose a fan with a capacity 2–4 times greater than the minimum required airflow.
For the most common grow tent sizes:
60×60 cm → 100–180 m³/h
80×80 cm → 150–280 m³/h
100×100 cm → 250–450 m³/h
120×120 cm → 350–600 m³/h
Properly sized ventilation makes it much easier to maintain optimal temperature, humidity, and air quality throughout the entire lifecycle of your grow tent.
Check Out Our Other Guides
If you are still setting up your grow tent or looking to improve your growing conditions, be sure to explore our other guides as well: